
Learn how to get perfect masking lines. Also several different masking materials explained.
In the last masking article, I covered the very basic masking supplies needed for powder coating and also the reasons you would need to mask. In this article, I will show you some not so common ways to mask off parts when powder coating and also show you how to get nice, clean looking masking lines.

Powdercoatguide.com is a participant in the Amazon Services LLC Associates Program, an affiliate advertising program designed to provide a means for sites to earn advertising fees by advertising and linking to amazon.com.
One extra step for nice, crisp, clean masking lines:
When you mask off a part with high-temperature tape, the tape can stay on the part the entire time the part is cured in the oven. However, you will find that after the part is done and you try to remove the tape, that the powder around the edge of the tape can flake off leaving a very jagged, messy line. This jagged line doesn't look good or professional at all. I will explain my method to avoid these messy masking lines.
First, I mask and powder coat my part as usual and put it in the oven. When the part is around 200 degrees, the powder should start to melt, changing from a dry powder look, to a wet speckle look. When the powder just reaches this wet speckle stage, I pull the part out of the oven and hang it back on my rack. Make sure not to touch the part here, it is basically like touching wet paint, and it is also hot enough to burn you. I use a pair of needle nose vice grip pliers to grab the hook that is holding the part, never the part itself. Once the part is hanging on the rack, I continue to hold the part by the hook using the pliers. This gives it some stability so it is not swinging around everywhere. I then very carefully pull off the tape using a scalpel and tweezers, making sure not to touch any of the powder coated piece. Just gently stick a scalpel, razor blade, or exact-o knife underneath the edge of the tape to lift it up a little bit. Then you can use tweezers or your fingers to remove it from the part completely. For masked off holes, you can stab the scalpel through the middle of the tape, the hole then leaves something to grab onto with the tweezers. I also remove any silicone plugs at this time using needle-nosed pliers.
 You will need to work fast but carefully to do this. You don't want the part to cool down too much. If the part is too cool, the powder can flake off. If the part is too hot, the powder will be stringy and stick to the tape as you pull it. The stringy powder can land on previously masked area, ruining the clean line. Right around 180-200 degrees F is the sweet spot for pulling the tape. Keep your infrared thermometer handy and check the temperature as you unmask your part. On large, extensively masked parts, the part can cool too much leaving you with flaky lines as you unmask. If you find the part has cooled too much, you can re-heat the part using a heat gun or a torch
 at a distance. Once you have heated the area back up to 200 degrees, you can start removing the tape again. Alternatively, you can transfer the part back into the oven again to re-heat it if you do not have a heat gun or torch. Once a part cools down too much below 160, I heat up the area with the heat gun in one hand, and my infrared temp gun in the other hand.
After all of your masking is removed from the part, you then put it back in the oven and continue as normal: set the temperature as specified by your powder's instructions, wait until the part reaches that temperature, and then start your timer. Once the part is done and comes out of the oven, you will see beautiful, crisp, clean masking lines. This method also opens the door to many different types of masking materials that cannot withstand 400 degrees like the high-temp powder coating tape can.
 3M Painters tape is much easier to work with than the high-temperature powder coating tape as it is able to conform around bends. The 3M painters tape I have used and had success with is the standard blue painters tape and the green Automotive Performance Masking Tape. The 1" wide rolls seem to be the most versatile. The blue painters tape can withstand about 200 degrees in the oven, can conform around mild bends, and isn't as sticky as the green tape. When you are masking a part with gloves on, tape that is not so sticky is actually a blessing.
The green painters tape comes off easy even after reaching 250 degrees, can conform around more complex bends than the blue, and has a much stronger adhesive. The green tape is somewhat stretchable, so it is very good for complex parts. The only issue with it is when you are masking a part wearing gloves. The green tape likes to stick to the gloves more so than the part so there is a little bit of a battle there. This type of tape cuts easily with scissors, a razor blade, or a scalpel. However, when using a scalpel, it does not leave as crisp of a line as the high-temp tape.

When using either of these tapes, it is very important not to let it get too hot in the oven. If you forget about it and leave it on the part for a full cure (~400 for 10 minutes), it will no longer be easy to remove. If you have ever tried removing the regular beige colored masking tape after it has been stuck to something for a couple of years, you will have a pretty good idea of what this painters tape is like if you leave it in the oven too long. The adhesive burns and the tape turns hard. It will peel off the part in pieces leaving a huge mess. Just remember not to use this tape for a full cure. If you use this tape, make sure to follow the instructions above.
Aluminum foil is a great way to mask large areas that would otherwise take many rows of tape. Aluminum foil is fine in the oven at any temperature involved in powder coating. Aluminum foil obviously has no adhesive properties, so it will need to be supplemented with tape. Apply a piece of tape where you want your masking line to be. Lay out your aluminum foil to cover the area you want to mask off, but you want the edge of the aluminum foil to hang over your piece of tape a little. Then apply another piece of tape on top of your original tape, sandwiching the aluminum foil in-between. Aluminum foil is a great time-saver and much cheaper than tape for the amount of area it covers.
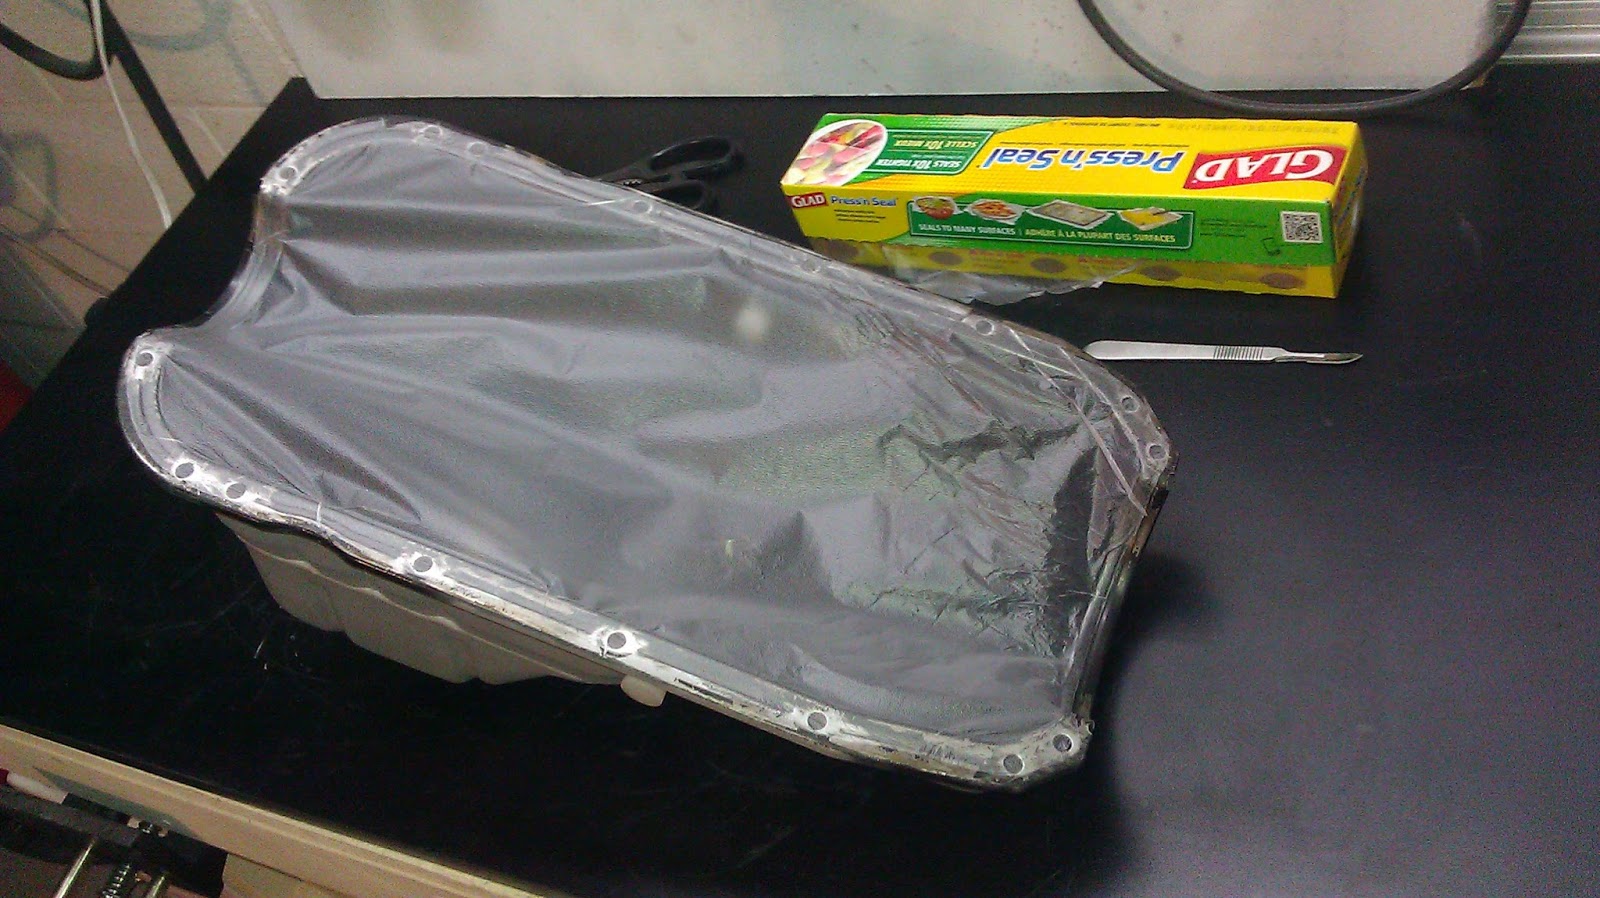
Glad Press'n Seal is a great, although unusual, way to mask large areas when powder coating. For those of you that have never used it, it is basically a saran wrap that can actually stick to other things other than itself. You can see one application here:

I was able to mask off the interior of this oil pan in less than a minute using the Glad Press'n Seal . To use it in this type of application, just follow these steps:
It is great for parts that have large flat areas like this oil pan, it also works well on valve covers, heads, engine blocks, etc. The downside is that it the Glad Press'n Seal cannot handle any oven temperatures without shriveling up. It must be removed before the part enters the oven. I do this by very carefully peeling up one area with a scalpel and slowly pulling it up. Make sure that no powder fell off of the Press'n Seal onto the area that was masked, then put the part in the oven and cure as usual.

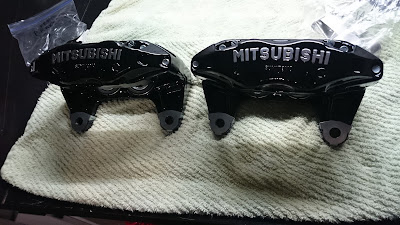
The last form of masking I will talk about in this article is not really masking at all. There are some situations where you will get better results by spraying the entire part with powder, even the area you wanted to mask, and then removing the powder from this area before you put the part in the oven. This is best done on raised areas, such as the raised letters on a intake manifold, valve cover or brake caliper. You can remove the powder using many different methods. Below I will explain one of the methods.
 You can use a damp finger to wipe powder from a raised surface. Keeping your finger slightly wet helps the powder to stick to your finger and not just brush off onto another area of your part. I keep a cup of water and a rag at my side. I dip my finger in the water and wipe off the excess on the rag, just leaving my finger slightly damp. Then carefully I start to wipe off the powder. The trick to this method is to only wipe a very small section at a time so the powder doesn't build up. I wipe about 1/2" with my finger, before I clean my finger with the rag, re-dampen my finger, and repeat. When you wipe, do so to collect the powder on your finger and not brush it off onto your part. It takes some time, and you must be extremely careful to only wipe what you are meaning to wipe. One little bump into a good area of powder, means starting all over again. It is best for your part to be sitting on a solid surface if possible.
Sometimes your fingers are a little too bulky or not the right shape to use. You can also use damp Q-tips, towels, sponges, or whatever you can think of that can wipe off the powder successfully. This starter motor was done with lots and lots of damp Q-tips. It was powder coated with bonded black chrome, which also needs a clear coat. This entire process had to be repeated for the clear coat.

So now that you know a couple new ways to mask off your parts before powder coating, I am going to wrap up the article with one more piece of advice.
When you mask off a part using high-temp tape, foil, etc., it is only good for one coat of powder. If you want to spray 3 coats of powder, you should mask the part 3 times. Trying to re-use the same masking for more than one coat always ends up looking terrible. When I was new to coating, it took me so long to mask things, I thought the idea of doing it all over again for another coat was ridiculous. I didn't unmask my part and just used the tape that was already on there for the 2nd coat. The edges came out terrible. The lines were flaky and jagged, the powder actually bulged up on the edges and I ended up having to completely redo the part. By trying to save time, I spent much longer in the end, so just take my advice and re-mask for every additional coat.
Thanks for reading and if you enjoyed what you read or have any questions, feel free to leave a comment. Stay tuned for the next article. See more masking techniques in the previous Masking article.
 You will need to work fast but carefully to do this. You don't want the part to cool down too much. If the part is too cool, the powder can flake off. If the part is too hot, the powder will be stringy and stick to the tape as you pull it. The stringy powder can land on previously masked area, ruining the clean line. Right around 180-200 degrees F is the sweet spot for pulling the tape. Keep your infrared thermometer handy and check the temperature as you unmask your part. On large, extensively masked parts, the part can cool too much leaving you with flaky lines as you unmask. If you find the part has cooled too much, you can re-heat the part using a heat gun or a torch
After all of your masking is removed from the part, you then put it back in the oven and continue as normal: set the temperature as specified by your powder's instructions, wait until the part reaches that temperature, and then start your timer. Once the part is done and comes out of the oven, you will see beautiful, crisp, clean masking lines. This method also opens the door to many different types of masking materials that cannot withstand 400 degrees like the high-temp powder coating tape can.
Alternatives to High-Temp Powder Coating Tape
3M Blue & Green Painters Tape
3M Painters tape is much easier to work with than the high-temperature powder coating tape as it is able to conform around bends. The 3M painters tape I have used and had success with is the standard blue painters tape and the green Automotive Performance Masking Tape. The 1" wide rolls seem to be the most versatile. The blue painters tape can withstand about 200 degrees in the oven, can conform around mild bends, and isn't as sticky as the green tape. When you are masking a part with gloves on, tape that is not so sticky is actually a blessing.The green painters tape comes off easy even after reaching 250 degrees, can conform around more complex bends than the blue, and has a much stronger adhesive. The green tape is somewhat stretchable, so it is very good for complex parts. The only issue with it is when you are masking a part wearing gloves. The green tape likes to stick to the gloves more so than the part so there is a little bit of a battle there. This type of tape cuts easily with scissors, a razor blade, or a scalpel. However, when using a scalpel, it does not leave as crisp of a line as the high-temp tape.

When using either of these tapes, it is very important not to let it get too hot in the oven. If you forget about it and leave it on the part for a full cure (~400 for 10 minutes), it will no longer be easy to remove. If you have ever tried removing the regular beige colored masking tape after it has been stuck to something for a couple of years, you will have a pretty good idea of what this painters tape is like if you leave it in the oven too long. The adhesive burns and the tape turns hard. It will peel off the part in pieces leaving a huge mess. Just remember not to use this tape for a full cure. If you use this tape, make sure to follow the instructions above.
Aluminum Foil
Aluminum foil is a great way to mask large areas that would otherwise take many rows of tape. Aluminum foil is fine in the oven at any temperature involved in powder coating. Aluminum foil obviously has no adhesive properties, so it will need to be supplemented with tape. Apply a piece of tape where you want your masking line to be. Lay out your aluminum foil to cover the area you want to mask off, but you want the edge of the aluminum foil to hang over your piece of tape a little. Then apply another piece of tape on top of your original tape, sandwiching the aluminum foil in-between. Aluminum foil is a great time-saver and much cheaper than tape for the amount of area it covers.
Glad Press' n Seal
Glad Press'n Seal is a great, although unusual, way to mask large areas when powder coating. For those of you that have never used it, it is basically a saran wrap that can actually stick to other things other than itself. You can see one application here:
I was able to mask off the interior of this oil pan in less than a minute using the Glad Press'n Seal
- Lay the Press'n Seal piece on your bench with the sticky side facing up.
- Lay the part to be masked upside down on top of it and press it down.
- Turn part over and really press down the Press'n Seal to make sure it is stuck to the part.
- Turn part upside down again.
- Take a scalpel or razor blade and trim the excess off around the outside edge of the part.
It is great for parts that have large flat areas like this oil pan, it also works well on valve covers, heads, engine blocks, etc. The downside is that it the Glad Press'n Seal cannot handle any oven temperatures without shriveling up. It must be removed before the part enters the oven. I do this by very carefully peeling up one area with a scalpel and slowly pulling it up. Make sure that no powder fell off of the Press'n Seal onto the area that was masked, then put the part in the oven and cure as usual.
Powder Removal: Wiping with a damp finger
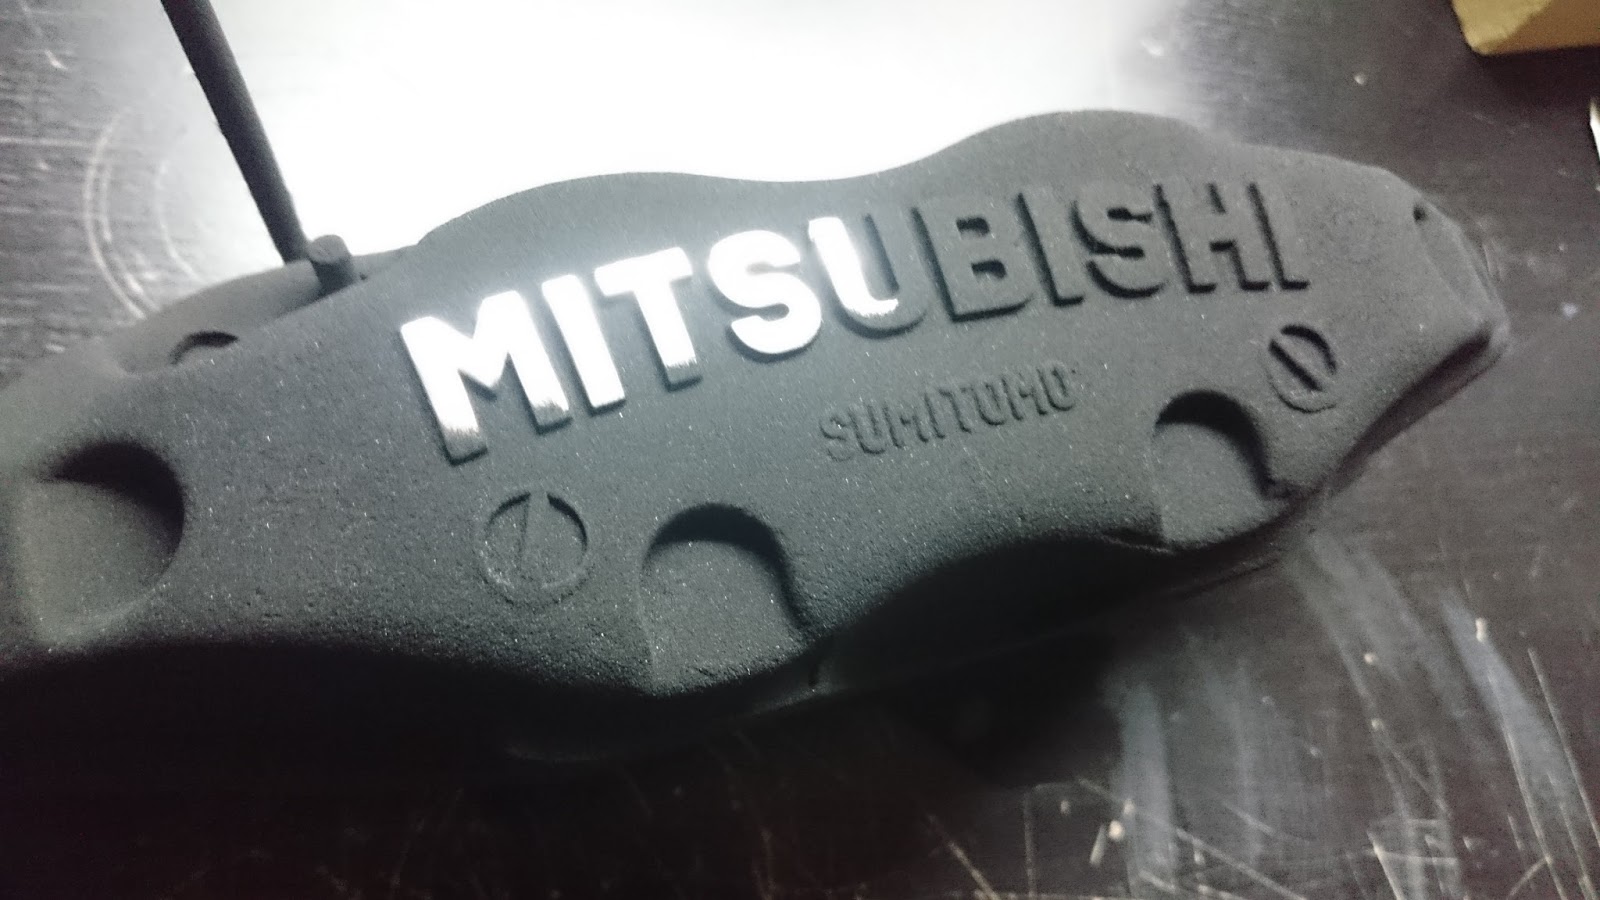
The last form of masking I will talk about in this article is not really masking at all. There are some situations where you will get better results by spraying the entire part with powder, even the area you wanted to mask, and then removing the powder from this area before you put the part in the oven. This is best done on raised areas, such as the raised letters on a intake manifold, valve cover or brake caliper. You can remove the powder using many different methods. Below I will explain one of the methods.
 You can use a damp finger to wipe powder from a raised surface. Keeping your finger slightly wet helps the powder to stick to your finger and not just brush off onto another area of your part. I keep a cup of water and a rag at my side. I dip my finger in the water and wipe off the excess on the rag, just leaving my finger slightly damp. Then carefully I start to wipe off the powder. The trick to this method is to only wipe a very small section at a time so the powder doesn't build up. I wipe about 1/2" with my finger, before I clean my finger with the rag, re-dampen my finger, and repeat. When you wipe, do so to collect the powder on your finger and not brush it off onto your part. It takes some time, and you must be extremely careful to only wipe what you are meaning to wipe. One little bump into a good area of powder, means starting all over again. It is best for your part to be sitting on a solid surface if possible.
 |
| Uncured powder wiped from mating surface using damp Q-tips. |

So now that you know a couple new ways to mask off your parts before powder coating, I am going to wrap up the article with one more piece of advice.
When you mask off a part using high-temp tape, foil, etc., it is only good for one coat of powder. If you want to spray 3 coats of powder, you should mask the part 3 times. Trying to re-use the same masking for more than one coat always ends up looking terrible. When I was new to coating, it took me so long to mask things, I thought the idea of doing it all over again for another coat was ridiculous. I didn't unmask my part and just used the tape that was already on there for the 2nd coat. The edges came out terrible. The lines were flaky and jagged, the powder actually bulged up on the edges and I ended up having to completely redo the part. By trying to save time, I spent much longer in the end, so just take my advice and re-mask for every additional coat.
Thanks for reading and if you enjoyed what you read or have any questions, feel free to leave a comment. Stay tuned for the next article. See more masking techniques in the previous Masking article.
ThumbUp! thank you
ReplyDeleteThank you! I am glad that you enjoyed the article.
DeleteGreat article but what about 2 tone powder coat? I get a build up of adhesive from the tape on the first coat and stays permanently on the coat? What am I doing wrong here?
DeleteHere is a paper masking tape that can handle the temperature. It is easier to work with than the plastic high temp tapes. It is Shurtape CP901, https://twshurtape.s3.amazonaws.com/CP_901_TDS.pdf
ReplyDeleteThank you for the suggestion, I have never used that tape. However, I do see that it says 1-2 minutes only at 450 degrees. At that temp, regular painters tape will actually hold up for a very short time too. I will keep it in mind though.
DeleteThank you and its really really helpful for me.
DeleteAwesome info... I'll be searching for an article on how to mask a part to have a different color design on a part that is powdercoated. For my first project I want to coat my bike fender black and have a design coated in a different color.
ReplyDeleteI don't have an article for it yet, but it is pretty straight forward. First you will shoot your fender black and do a partial cure in the oven, about 3/4 of the cure time. Then you will let the fender cool completely. Do your masking and shoot your next color and place it in the oven. Once the fender is heated up to around 200 degrees, pull it out and very very carefully pull the masking, this will take some practice but it gives the cleanest masking lines. You will want to pull the masking right when the part is around 170-180 degrees. If it is too cold, then the powder is likely to stick to the masking and leave little chunks. If it is too hot, then the powder will get stringy when you pull the masking. At the correct temp, the masking will cut the powder perfectly leaving a nice sharp masking line.
DeleteThe next part is up to you, you can either put the fender back in the oven do a full cure or, you can do another partial cure, let it cool, and spray the whole part with clear and then do the full cure. If you add the clear, it will even out the ridge from the masking.
Sean. Thanks for breaking that down. Been browsing the whole internet for those exact details. Wondering what the best way to mask off for a two tone on a set of motorcycle rims. ��
DeleteHow would you proceed when I have a motorcycle wheel rim, which I have powder coated into a black color and now I would like to add some stickers to it AND protect them with a clear coat. Should I pre-heat the rim or but the stickers on and heat the rim a little, take it out to cool out and put it back in or how?
ReplyDeleteSince you already powder coated it black, you would simply apply the stickers, shoot the clear, and then do a final bake. However, if you have any extra stickers, I would test them in the oven applied to something you don't care about to ensure that they will not discolor or burn. If they pass the test, you should be safe to apply them to your wheels.
DeleteSorry, made one mistake while writing my question. The rims are not yet painted black so should I first coat them black, do a partial cure, add the stickers, add clear coat and make the final cure? Or should I proceed with the method you mentioned earlier?
DeleteOh ok, I thought you already coated them and did a full cure. Since you haven't coated them yet, you're exactly right.
ReplyDelete1. Prep the wheels
2. Shoot the black
3. Partial cure
4. Let wheels cool completely.
5. Apply stickers with clean gloves
6. Shoot clear
7. Full cure.
I was wondering if u had any helpful videos online youtube etc thanks for the infomation
DeleteI've been using vinyl for logo, names etc and powder coating around the vinyl . I let the powder flow then pull the vinyl off to get the powder color and logo, name etc is the finish of the material. My problem is the vinyl leaves the sticky glue adhesive stuff behind and everything I've tried to use to clean it messes up the powder coat finish.
ReplyDeleteI actually take the vinyl off at about 135° F and it comes clean. I have used vinyl remover with a qtip to do small clean up.
DeleteWhat temp are you pulling the vinyl and what type of vinyl is it?
DeletePulling the vinyl off at around 180 degrees F usually results in no residue. I have used oracle 651 and 751 and they did not leave any residue.
I was wondering what to do about powder coating on raised surfaces, so it helps to know that I can use a damp finger to wipe it off. Mentioning to keep my finger slightly wet to make sure that the powder sticks to it is really helpful. I was worried that it would just brush off to another area, so I need to remember that to prevent it from getting on other surfaces when using powder coating. Thanks for the information!
ReplyDeleteIt's helpful to know that between 180 and 200 degrees is the sweet spot for pulling the tape. As you say, there are a couple of issues that you run into if the temperature isn't right. Thus, I'll make sure that I have the means of measuring the temperature, and I'm being wary and careful of this while I'm finishing my project. Thank you for sharing! http://www.powdercoatingspecialties.com
ReplyDeleteThank you for the unique information! I am going to pay to get a few items for my hot rod coated and thought I would tape them myself. Now I think I will just let the people tape them their selves. They screw up, it is on them, not me. Again, I am considering buying a system and doing some of my smaller items. Thanks for the tips!
ReplyDeleteI have a faceplate that needs powdercoat on the front and edges but not the back. There are a lot of studs sticking up on the back that prevent any flat adhesive mask. My idea is to use a rectangular shallow box to keep the powder off while applying and removing it before the faceplate goes into the oven. I don't care if the edges are crisp. Is there a material for the box that will not attract the powder?
ReplyDeleteI have a faceplate that needs powdercoat on the front and edges but not the back. There are a lot of studs sticking up on the back that prevent any flat adhesive mask. My idea is to use a rectangular shallow box to keep the powder off while applying and removing it before the faceplate goes into the oven. I don't care if the edges are crisp. Is there a material for the box that will not attract the powder?
ReplyDeleteYOur effort is great, thx a lot mr
ReplyDeleteExcellent article. This will really help out.Thanks and keep up the excellent work!!!
ReplyDeleteThank you for your article; it is very informative and helpful as I plan my first powder coating venture. I have a question please: in the last part of the article, you mention that if we want to spray more than one coat of powder, we need to remask each time. I was not aware that you can spray multiple coats for powder coating: I'm learning something new each day. Do you spray powder, bake it, and then spray again? Do you have to do any surface prep between each coat? I was just looking for clarification, and I ask because you mention having to remask between each coat. Thank you in advance.
ReplyDeleteYes it is definitely possible to spray multiple coats of powder and you are correct in your guess. No surface prep is required, ideally you would not touch the first coat of powder at all before you spray your next coat. If you look for an article on my site called "Spraying Multiple Coats", you will find out how to do this correctly.
DeleteExcellent article. I'm a new DIY'r. I'm currently stripping 9yr old spray paint and now powder coating the parts.
ReplyDeleteIt's an oddball project (Life-size aluminum R2-D2) and I have some masking challenges.
One part I need to mask has some grooves 1/8" deep but need the end open for painting (hard to explain/picture).
Has anyone used modeling clay to mask? I was thinking I could cram it in the grooves at the end and razor cut the shape as required. Regular high temp tape the rest?
Thank you and it sounds like you have an interesting project. What you are proposing could work a long as you remove the clay before you bake the part in the oven. I cannot picture the part, but it sounds like you could also coat the part and the teeth, and use some damp q-tips or a fine brush to then remove the powder from the teeth. Without seeing the part, I cannot say for sure. But as a general rule, you can use anything to mask as long as it is removed before curing the part.
ReplyDeleteDear , I am interested to know how to do Masking of a LPG Gas Cylinders , as they have bigger surface area , so what can be the best option to do 2 colors. and we prefer something cost effective
ReplyDeleteThe most cost effective ways to mask larger items is by using materials that won't see the inside of the oven, or if they do, will only be in there for a short amount of time (until the powder flows out).
DeleteGlad Press n'Seal works pretty well for quickly masking large areas but must be removed before putting part in the oven. Best way to use it is to use high-temp tape or painters tape on the edge where the two colors meet, then use the Press n'Seal to mask the large remaining area and have it end on the edge of the tape. After coating, remove the Press n'Seal (being careful not to let any powder fall on the unmasked surface), put the tank in the oven until the powder flows out, then remove the tape, and then do your full cure.
Other alternatives are aluminum foil or vinyl masking like Oracle 651. These are more expensive alternatives but they both withstand some oven time and may be more appropriate depending on exactly what you are coating. Hope that helps!
EXTREMELY handy guide... thank you so mcuh for taking the time to post form these articles. Very good information for beginners.
ReplyDeleteHi can i say that i find your articles very interesting and informative and after running my own powdercoating shop for 25 years i never stop learning on how improve .One area i always have issues with is how to mask the polished outer edge on a alloy rim as the tape never lays straight .Do you have any suggestions many thanks
ReplyDeletewhat is the best to use on bolts.. we find the blue painters tape doesnt work well
ReplyDeleteI love this article.
ReplyDeleteHi, POWDERCOATINGGUY, and thanks, great article. I would however suggest that you should begin any posts like this with a disclaimer, explaining that certain parts should NOT be powder-coated. Aluminum SCUBA tanks, for example have been known to explode (with catastrophically fatal consequences) when being re-filled after powder-coating. Aluminum hubs for spoked motorcycle wheels have also been prone to catastrophic failure. This is always a result of the powder baking temperature being high enough to negatively affect the factory heat-treatment and tempering. Basically, when it comes down to the powder-coating of alloys in structural applications (other than irons and steels) care should be exercised and research should be done.
ReplyDelete